Installing Netopia Virtual
Office
The information provided on this page should help you get your Netopia
Virtual Office up and running in a matter of minutes.
All of the procedures in this chapter assume that you have a TCP/IP network
or dial-in connection installed, configured, and running.
 Before
Installing Netopia Virtual Office
Before
Installing Netopia Virtual Office
Please read any late-breaking news documents.
To read the very freshest late-breaking news, point your Web browser
at http://support.netopia.com/voffice/newnews.html.
Installing
Virtual Office from the CD
To install Netopia Virtual Office from the CD:
- Shut down any versions of Virtual
Office that are currently running on your computer.
- Insert the Netopia Virtual Office CD into your CD-ROM drive.
- If you are using Windows 95 , start Windows Explorer.
If you are using Windows 3.1, start the File Manager.
- From Windows Explorer or the File Manager, select the CD-ROM drive
that contains Netopia Virtual Office.
- Locate the setup.exe file and double-click it.
- The Netopia Virtual Office Setup program's Installation Wizard appears.

Just read the Wizard's comments, answer any questions the Wizard asks,
and keep clicking the Next button. For example, the Wizard will ask you
where you'd like to install Netopia Virtual Office. You can accept the
Wizard's installation recommendation or pick another installation location.
Note: If you are reinstalling Virtual Office and want to preserve
your previous Virtual Office preferences, make sure that you install your
new Virtual Office in the old location.
- If you are installing Netopia Virtual Office for the first time, the
Getting Started Wizard takes over.

It will guide you through you the process of entering your
- Virtual Office Business Card
data (name, occupation, phone number, fax number, etc.)
- Internet Name
- Farallon electronic registration information
- Virtual Office Trusted visitor
password (or "key") for your own use
Answer the questions as best you can. Don't worry--if you change your
mind later, you can always go back and change your configuration.
Note: If you lose or forget the password
that you entered with your Internet name, go to Farallon's lost password
page: http://www.farallon.com/product/nvo/dnspasswds.html
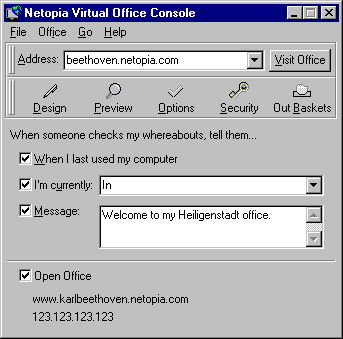
Once you have completed installation and configuration, the Netopia Virtual
Office Console appears on your desktop.
Note: If you intend to use the Intercom service, you will need
to restart your computer.
Removing
Virtual Office
Run the Netopia Virtual Office Uninstaller.
- In Windows 3.1, you will find the Uninstaller in the Netopia Virtual
Office program group.
- In Windows 95, you can start the Uninstaller program directly by selecting
the Programs > Netopia Virtual Office > Netopia Virtual Office Uninstaller
command in the Start button menu.
Note: When you uninstall Virtual Office, all of your Virtual Office
preferences will be deleted. A subsequent installation of Virtual Office
will have to be configured from scratch.

